pcut
USER MANUAL
PCUT™ USER MANUAL


ONCE YOU SUCCESSFULLY INSTALLED P-CUT™
- If you already have an account, please proceed to “Sign In”.
- If you do not yet have an account, please click “Register”.

ENTER YOUR REGISTRATION DETAILS
Please enter your valid email address and click “Send code to Email” to receive the verification code.
Then complete the required fields, enter the Gift Card Code provided to your email upon software purchase, and press Enter to proceed.

ACTIVATE YOUR ACCOUNT
If the Gift Card Code is valid, an “Activation Code” field will appear.
Please enter the activation code and fill in the "Invite Code" field, then complete the registration process.
01.01 HOME PAGE

YOU ARE NOW ON THE HOME PAGE OF THE SOFTWARE.
On this first page you'll find on the main screen the following articles:
- PAINT PROTECTION FILMS
- SPECTRA COLOR PPF
- INSTALLATION TIPS
- WATCH THE FULL TUTORIAL
- REGISTER YOUR WARRANTY
- RELOAD CREDIT
- USER MANUAL
01.02 HOME PAGE
01.02
HOME PAGE

On the top left side of the screen you will find the following information:
- Home button
- Kit Search, where you can find every pattern for both the Interior and Exterior of the most popular car on the market as well as motorcycles too.
- Saved Kits, your own library of every kit you desire to save due to personal modification or repetitive plotting. Every user can save up to 100 kits.
- Plotting Archive, is your cutting record of all plotting sessions. It becomes handy if you need to troubleshoot a speci fic pattern or plotting session.
01.03 HOME PAGE
01.03
HOME PAGE

On the bottom left side you will find the following
information:
- Credit balance in m 2 and times (times are extra plotting sessions to ensure full usage of your remaining credit).
- Expiry date of your cutting credit.
- Type of account
- History of credits add and successful plotting and auto nesting session.
- Profile
- Software version and connection status.
01.04 HOME PAGE
01.04
HOME PAGE

On the top right corner you will find the following information:
- Problem feedback with the software general feature.
- Options
02.01 KIT SEARCH
02.01
KIT SEARCH

YOU NOW ENTERED P-CUT™ PATTERNS LIBRARY
From this page, you will be able to access every single vehicle available for plotting. Starting on from the top, you will find the main categories
- Exterior ➝ Car paint patterns
- Interior ➝ Car interior patterns
- Motorcycle ➝ Motorbike exclusive patterns
- Electronic products ➝ Mainly phones patterns
- Door handle cups ➝ Generic patterns
- Window Film ➝ Car widow film patterns
02.02 KIT SEARCH
02.02
KIT SEARCH
Once a category selected, a series of sub-dropdown menu will appear:
MAKE - MODEL - YEAR - TRIM LEVEL / TYPE
- To search pattern, make your selection from left to right in each dropdown menu.
- Allow several second after each selection as the database is fully online, server searching time may occur.
- You will find in majority of the vehicle type COMPLETE VEHICLE and separate elements patterns.
Please note that 95% of our patterns are WRAPPED (extended edges) already to ensure maximum coverage without the need to modify the pattern initially.

02.03 KIT SEARCH
02.03
KIT SEARCH

To open a pattern, simply double click on the thumbnail and it will open it in the EDIT page.
- Finally, you will also
find additional information for each
patterns, such as the number of views, plots but also
additional user comments.
- For some patterns, additional description will be added to
inform you of specific modification done by our designers or
other members of the PROTECT PLUS Network.
03.01 EDITING PAGE
03.01
EDITING PAGE
ONCE A PATTERN HAS BEEN SELECTED, YOU WILL ENTER THE EDITING PAGE PRIOR PLOTTING.
Before diving in all editing function it is important to understand the plotting canvas area.
AREA 1
This is the plotting area. All patterns visible (and not highlighted red) will be plotted. By standard the patterns are automatically aligned and separated in 4-5 sections in the plotting area.
AREA 2
If there is additional elements outside of the plotting area, it will not be cut.
AREA 3
Lastly, ensure your canvas dimension are matching the type of film present in your plotter.

03.02 EDITING PAGE
03.02
EDITING PAGE
THE PLOTTING AREA

03.03 EDITING PAGE
03.03
EDITING PAGE

If you find elements highlighted in red in the plotting area, you will not be able to proceed with plotting.
Generally this is the case when some elements are overlapping each other or outside the canvas area.
03.04 EDITING PAGE
03.04
EDITING PAGE

You will find 2 crucial area:
AREA 1
Function area. It includes the most useful functions. Place your mouse over them to get description of the function it represent.
AREA 2
Toolbox area. All the tools necessary to edit patterns.
03.05 EDITING PAGE
03.05
EDITING PAGE

LET'S GO OVER EACH FUNCTION:
- Plot
- Align all elements automatically into the canvas.
- Copy & Paste
- Delete & Clear All
- Undo & Redo
- Group & Ungroup.
- ‣ Group can make a group of multiple selected elements. If you group multiple elements overlapping, the plotter will cut all of them.
- ‣ Ungroup will ungroup them into separated parts for modifications, such as delete or modify.
- Mirror - vertically or horizontally
- Cut - allows you to divide elements
- Scale lock - allows you to magnify or reduce an element proportionally.
- Auto-layout - AI function to provide you with autonesting of your patterns, resulting in efficient plotting.
- Save - save user kits.
03.06 EDITING PAGE
03.06
EDITING PAGE

TOOLBOX
- Select - Click select, and use left mouse button to select
a specific part or group.
- Hand - if you are using a 2-button mouse, click this tool and hold the left mouse button to drag the canvas.
- Ruler - Allows you to measure the distance between two points on a part.
- Pen - Draw a customised pattern.
- Shape drawing - Draw simple shapes and text.
- Import - Import existing ".plt" files or a picture for reference image to help drawing.
- Shadow / Delete all shadows - Allow to make a shadow in blue line to help identify the difference before and after modification of an element. Shadow will not appear in the plotted section.
- Edit Anchor / Modify Anchor - add or modify existing anchor points.
- Edge expansion - expand a selected edge or all element edges.
04.01 FAQ
04.01
FAQ
HOW TO CONNECT THE FILM CUTTING MACHINE?
Generally, if it is a software-supported film-cutting machine, the software will automatically recognise the machine after plugging in the USB cable. We currently support the following devices:
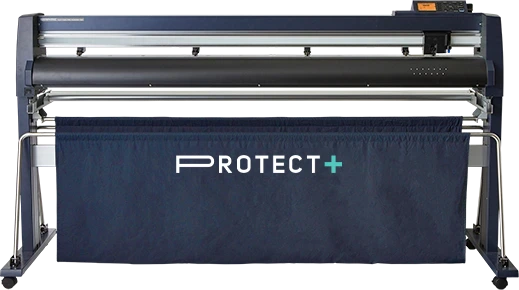
- Protect+
- Graphtec
- Saga
- Summa
- Gunner
- Roland
- Mimaki
- GCC
If your device is not included above, you can Contact Support
04.02 FAQ
04.02
FAQ

HOW TO DELETE THE HOLE POSITION OF THE PATTERN, LIKE DOOR HANDLE HOLE, CENSOR HOLE, AND FUEL TANK HOLE, ETC?
method a
After selecting the pattern, click Ungroup
Select the tank hole separately and click Delete
Be careful not to move the position of the other holes if there is!
04.03 FAQ
04.03
FAQ

HOW TO DELETE THE HOLE POSITION OF THE PATTERN, LIKE DOOR HANDLE HOLE, CENSOR HOLE, AND FUEL TANK HOLE, ETC?
method B
Select the pattern, double-click the left mouse button or click the Edit Anchor tool to enter the anchor point state.
Select the hole anchor point that needs to be deleted, then the anchor point will turn white, last click Delete .
04.04 FAQ
04.04
FAQ

HOW TO EXPAND THE OVERALL OR PARTIAL?
OVERALL:
- Select the patterns and click Edge Expansion.
- Fill in how much to expand or shrink.
- Click OK, and the pattern will expand automatically.
04.05 FAQ
04.05
FAQ

HOW TO EXPAND THE OVERALL OR PARTIAL?
PARTIAL EXPANSION:
- Select the pattern that needs to be expanded, and double-click to enter the anchor point state, then select the anchor point you need to expand the edge (select the first anchor point and then the last anchor point of this edge, this edge will be automatically selected).
- Click Edge Expansion, and fill in the size you need
- Click OK, and the pattern will expand automatically.
04.06 FAQ
04.06
FAQ

HOW TO CUT THE INTERIOR AND THE BODY TOGETHER?
- Open Both the Exterior and the Interiors
Elements, and Select All the Interiors.
- Click Copy, or Press the Shortcut Ctrl+C.
- Switch to the Layout of the Body, click Paste, or Press the Shortcut Ctrl+V.
- Click the Mouse in an Empty Space To Put Them Together for Cutting.

04.07 FAQ
04.07
FAQ

HOW TO MOVE, ROTATE THE PATTERNS AND THE OVERALL CANVAS?
Patterns movement: Select the part. Place the mouse arrow inside of the part, hold down the left mouse button and move the mouse to move the part.
Patterns rotation: Our arrow icons will appear when rotating the patterns, place the mouse on the arrow, hold down the left mouse button and move the mouse to rotate the pattern.
Canvas movement: Hold down the middle mouse button (scroll wheel) and move the mouse to move the overall canvas
04.08 FAQ
04.08
FAQ
KEYBOARD SHORTCUT
GENERAL |
Ctrl+Z | Go back one step |
Ctrl+Y | Forward one step |
ESC | Cancel selection |
Delete | Delete |
CANVAS OPERATION |
Ctrl + "+" | Zoom in the canvas |
Ctrl + "-" | Zoom out the canvas |
Ctrl + " ←" | Move the canvas to the left |
Ctrl + " → " | Move the canvas to the right |
Ctrl + " ↑ " | Move the canvas up |
Ctrl + " ↓ " | Move the canvas down |
Click RMB | Minimizes canvas |
After selecting the graph, click RMB | Maximize the graph |
GRAPH EDITING |
Double-click the graph | Enter edit mode |
Ctrl+A | Select all anchor points |
Delete | Delete line segment and anchor point |
"←" | Move anchor left |
"→" | Move anchor right |
"↑" | Move anchor up |
"↓" | Move anchor down |
Hold “Alt” and Select between two anchor points, hold LMB and drag | Drag the curve |
After choosing “add an anchor point” function button, drag the LMB across the line segment where you want to add an anchor point | add an anchor point |
Ctrl+C | Copy graph |
Ctrl+V | Paste graph |
Ctrl+A | Select all graphs |
Delete | Delete graphics |
Press and hold Shift to draw a graph | Draw a Regular triangle, a perfect circle, and a square |
05 THE CUTTING PROCESS
05
THE CUTTING PROCESS
1
Select the car model and open the cutout layout. If necessary, open the interior and copy it to the body.
2
identify which parts need to be cut and which holes need to be preserved. Check if the sunroof, shark fins, luggage rack, and word mark are consistent. Also, ensure that the rear cover has a rear wing and determine which positions need to be enlarged or reduced.
3
Before cutting, make sure that the machine is set to the correct speed and knife pressure. Also, ensure that the film material is placed flat.
4
Once the patterns are typeset, put each version into the cutting box and cut. Each version should be no longer than 4 meters long and 1.5 meters wide. Before clicking cutting, align the canvas by clicking Align Canvas. After the first version is finished, put it outside the box and put the second version into the box for cutting.
5
Finally, if there are any modifications to the pattern after cutting, it is recommended to save it to the account for future use.
06 SOFTWARE REQUIREMENTS
06
SOFTWARE REQUIREMENTS
RUNNING ENVIRONMENT
Windows 10.0 or newer
Internet connection required
Mac OS X users may launch on virtual machines
ACCOUNT NOTICE
This software will be bound to only one computer, please make sure that the software is logged on your future working computer for the first time. Changing the computer will cause login account to be locked.
CORRECT USING INSTRUCTION:
Please select a smaller sample of the parts for “Trial Cutting” before formal cutting. The benefits of doing this are:
Help to evaluate the accuracy of the overall pattern.
Help to evaluate whether the presetting “wrapping edge width” is suitable for your film installation habits, and you can make further adjustments through editing by “shrink” or “expand” function..
Make sure your plotter machine can work normally and output the correct size.
NEED FURTHER
ASSISTANCE?
Our support team is available to help you with setup, patterns, and cutter configuration.
